With privileged access groups, an extra privileged identity management (PIM) functionality has recently been added. It allows you to make individuals or groups eligible for group membership and ownership, as opposed to permanent allocations.
Because you can link different privileged identity management activation settings to these privileged access groups, it is possible to set different requirements for the activation depending on the group.
You can also link 1 privileged access group to multiple roles, with which you can effectively activate multiple roles with a single activation. Which makes multiple activations unnecessary.
Note: This functionality can only be used with groups that are set for role assignable groups. See Azure AD role-assignable groups for more details.
Onboarding Groups
To bring role assignable groups under the control of PIM and actually make a privileged access group out of it, you need the Privileged Role Administrator or Global Administrator role.
Enable PIM Management for role assignable group
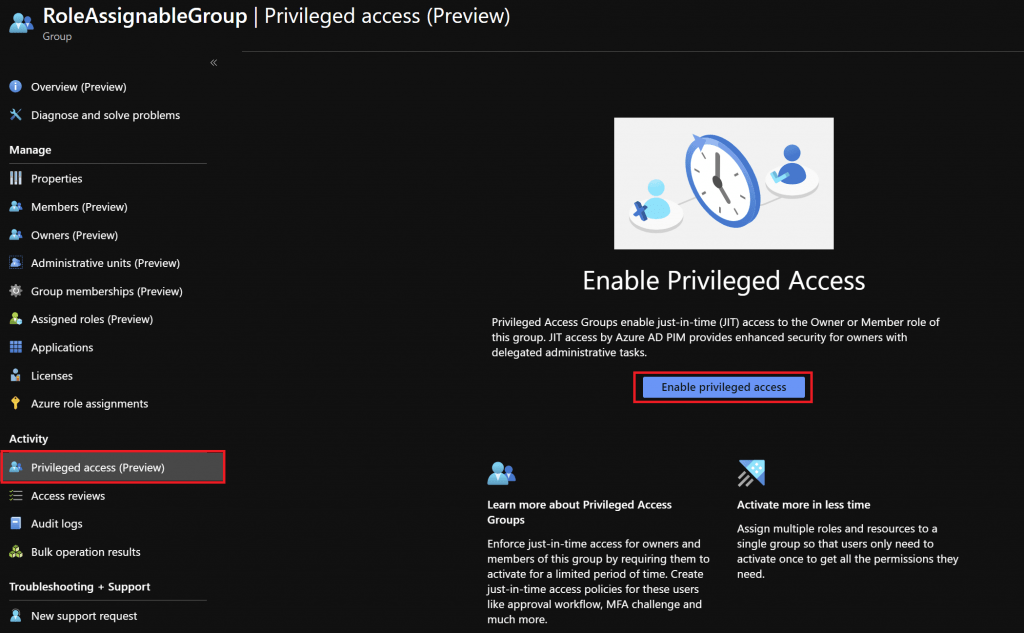
Open the group you want to manage using PIM (Azure Active Directory> Groups> Group Name) and select “Privileged access” on the left.
Click on “enable privileged access”. After which the group is onboarded.
Note: Once the group is brought under the management of PIM, it can’t be taken out of management.
Assign eligibility to privileged access group
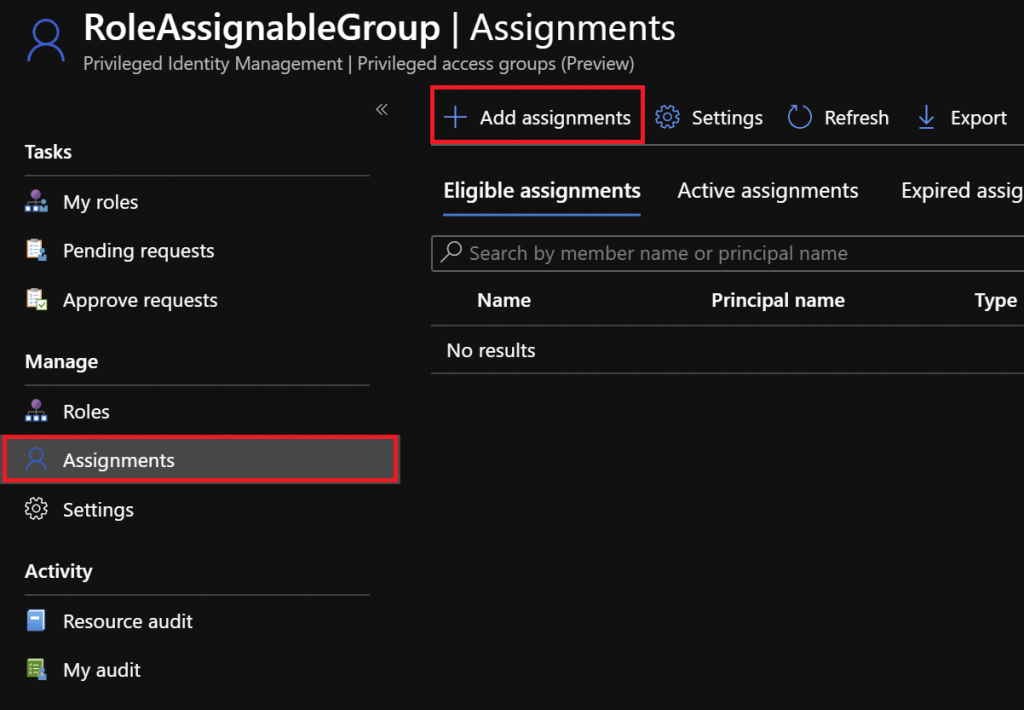
Once the group has been onboarded, a user can be made eligible to be a member or owner of the privileged access group. This can be done in several places, of which the group management section (see chapter above) and PIM (Privileged Identity Management> Privileged access groups> Assignments) are two options. The experience is identical.
Click on “Add assignments”
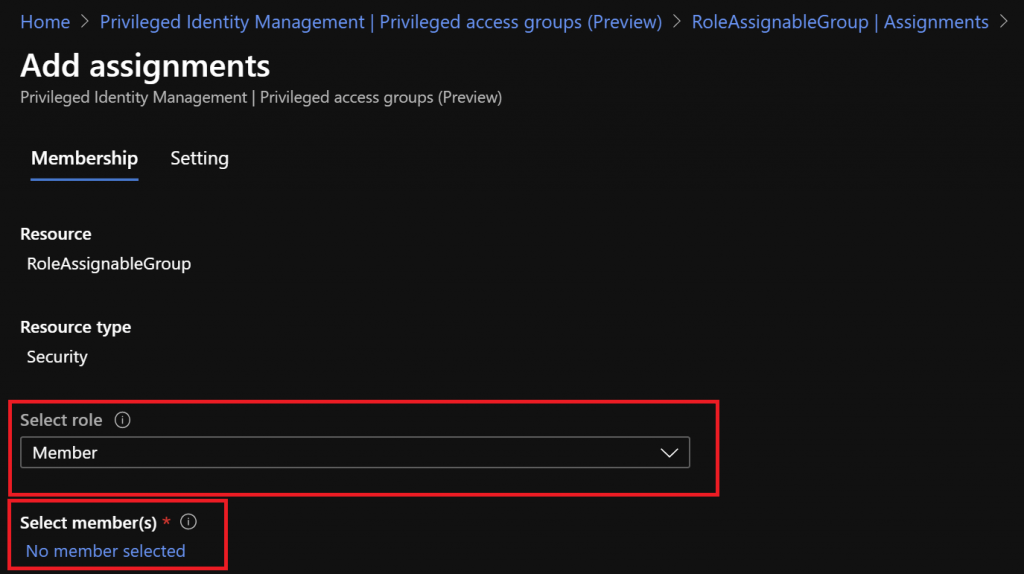
Provide the role (member or owner) and who (user or group) you want to assign the role eligibility to in the newly opened window.
Click on “Next”
Note: When selecting a group, keep in mind that activation of the role happens on a per user basis.
Secondly configure the assignment details and click on “Assign”.
Activate eligible group owner- of membership.
From the moment you’ve been assigned eligible group owner or member, you’re able to activate the assignment.
For the people already using PIM this is very identical to activating an Azure AD role of Azure resource assignment through PIM.
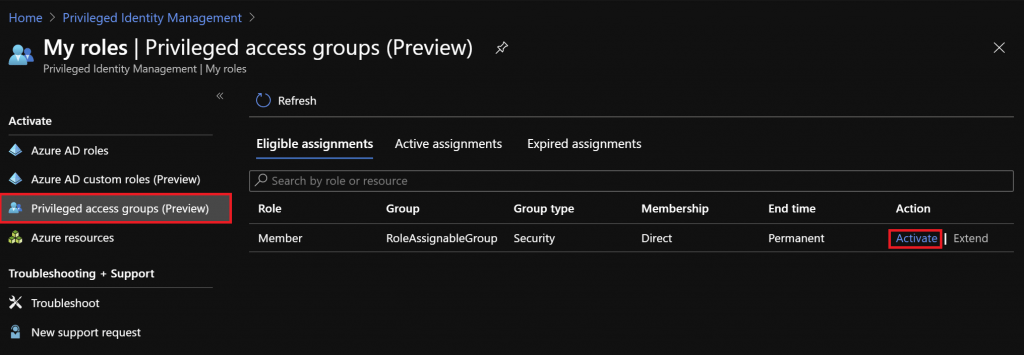
Go to your privileged access group assignments (PIM> My roles> Privileged access groups).
Over here you see all the groups you have an eligible owner of member assignment for.
Click on “activate” next to the role of the group you want to activate.
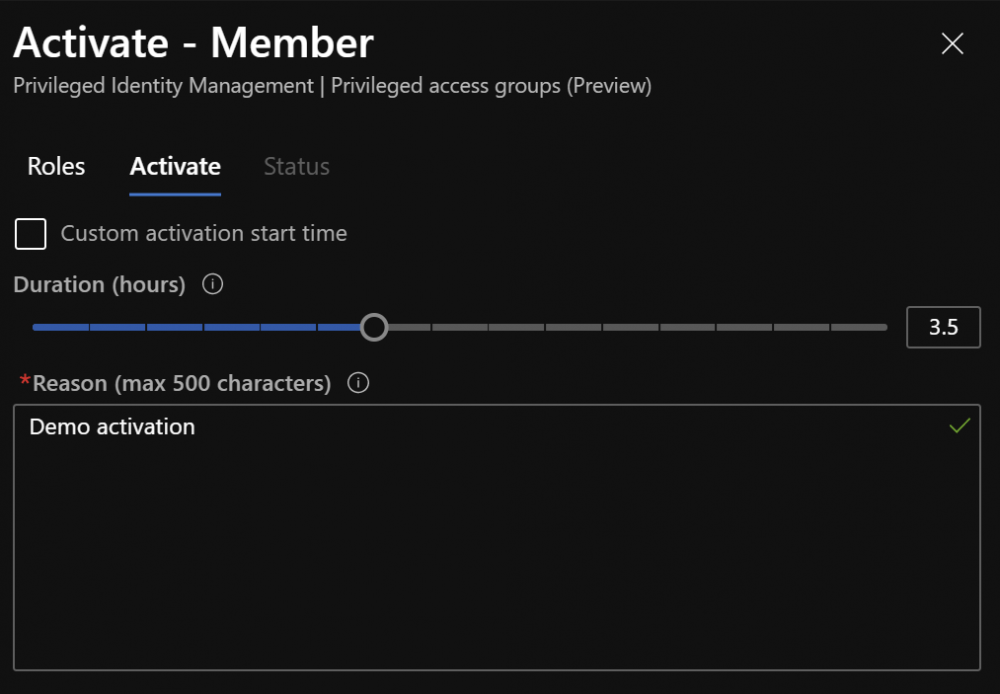
Provide the duration of the activation and the reason for activating the role, click on “activate”.
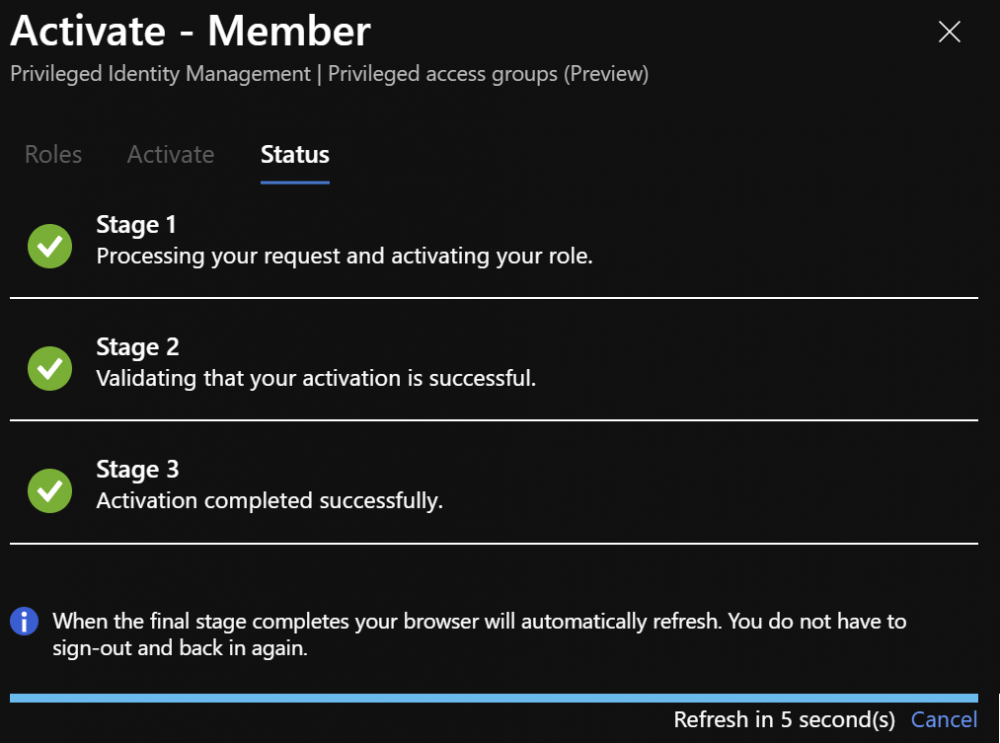
The overview will present you the activation progress.